deadmau5 Helmet
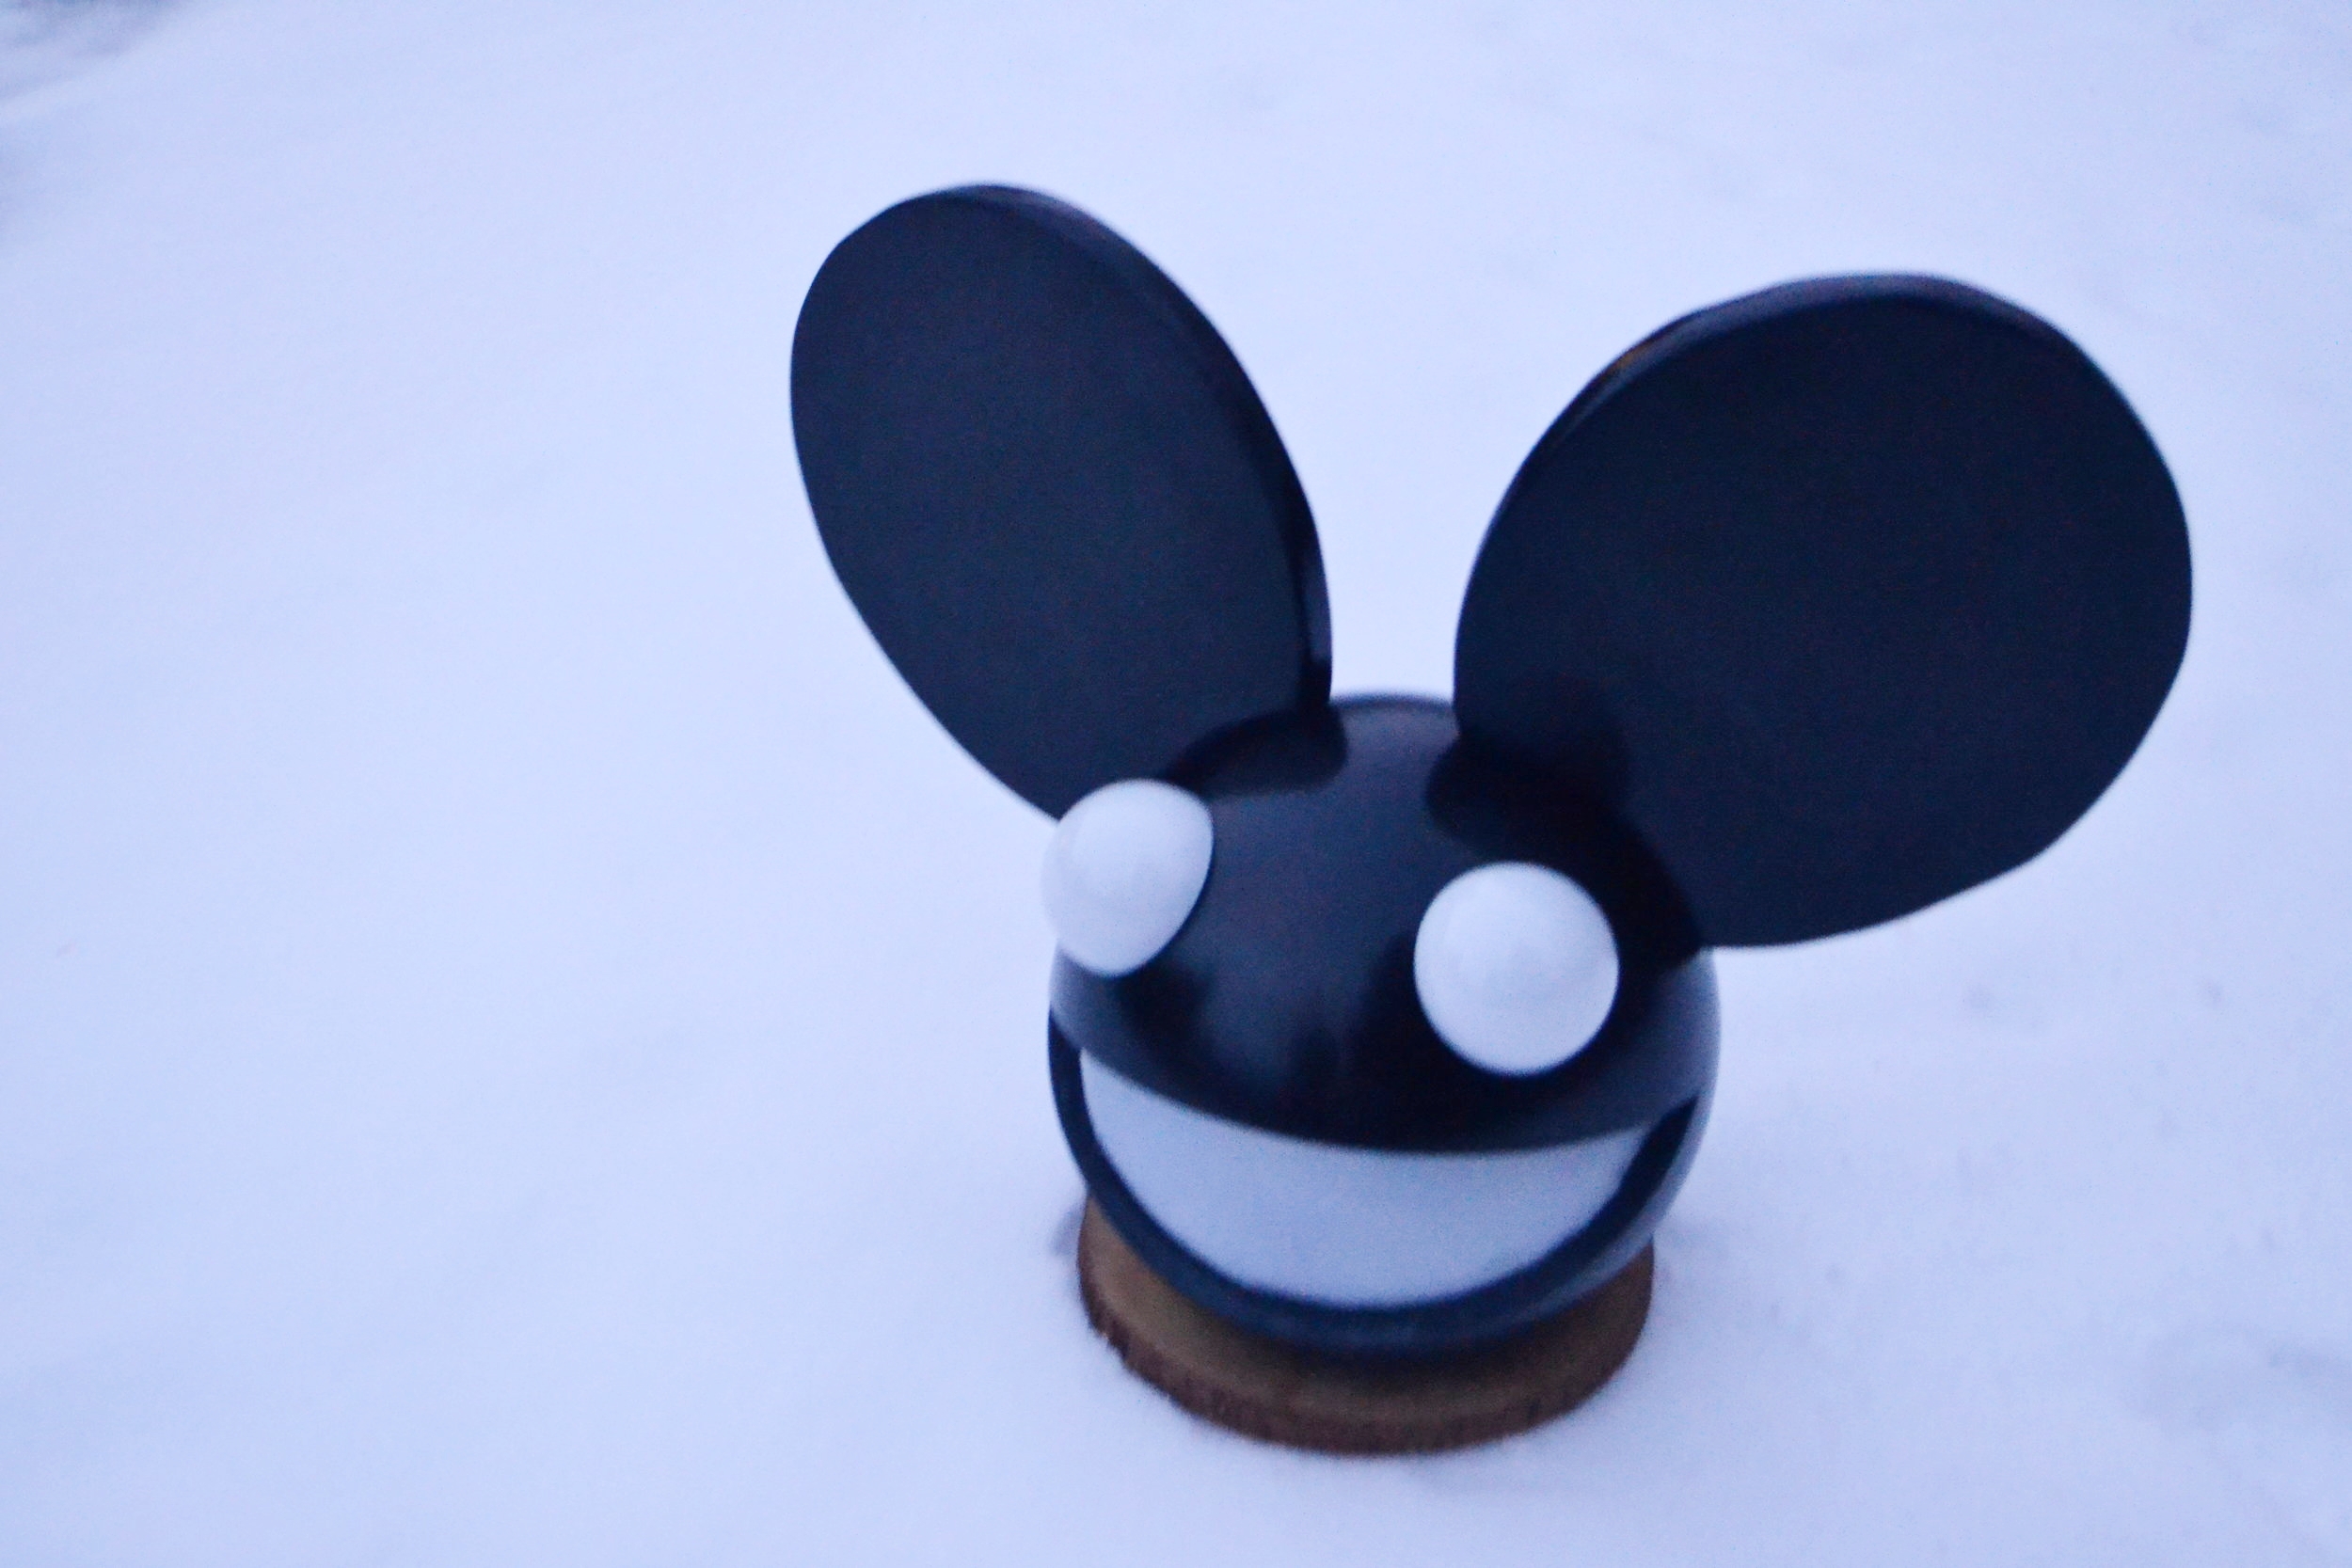
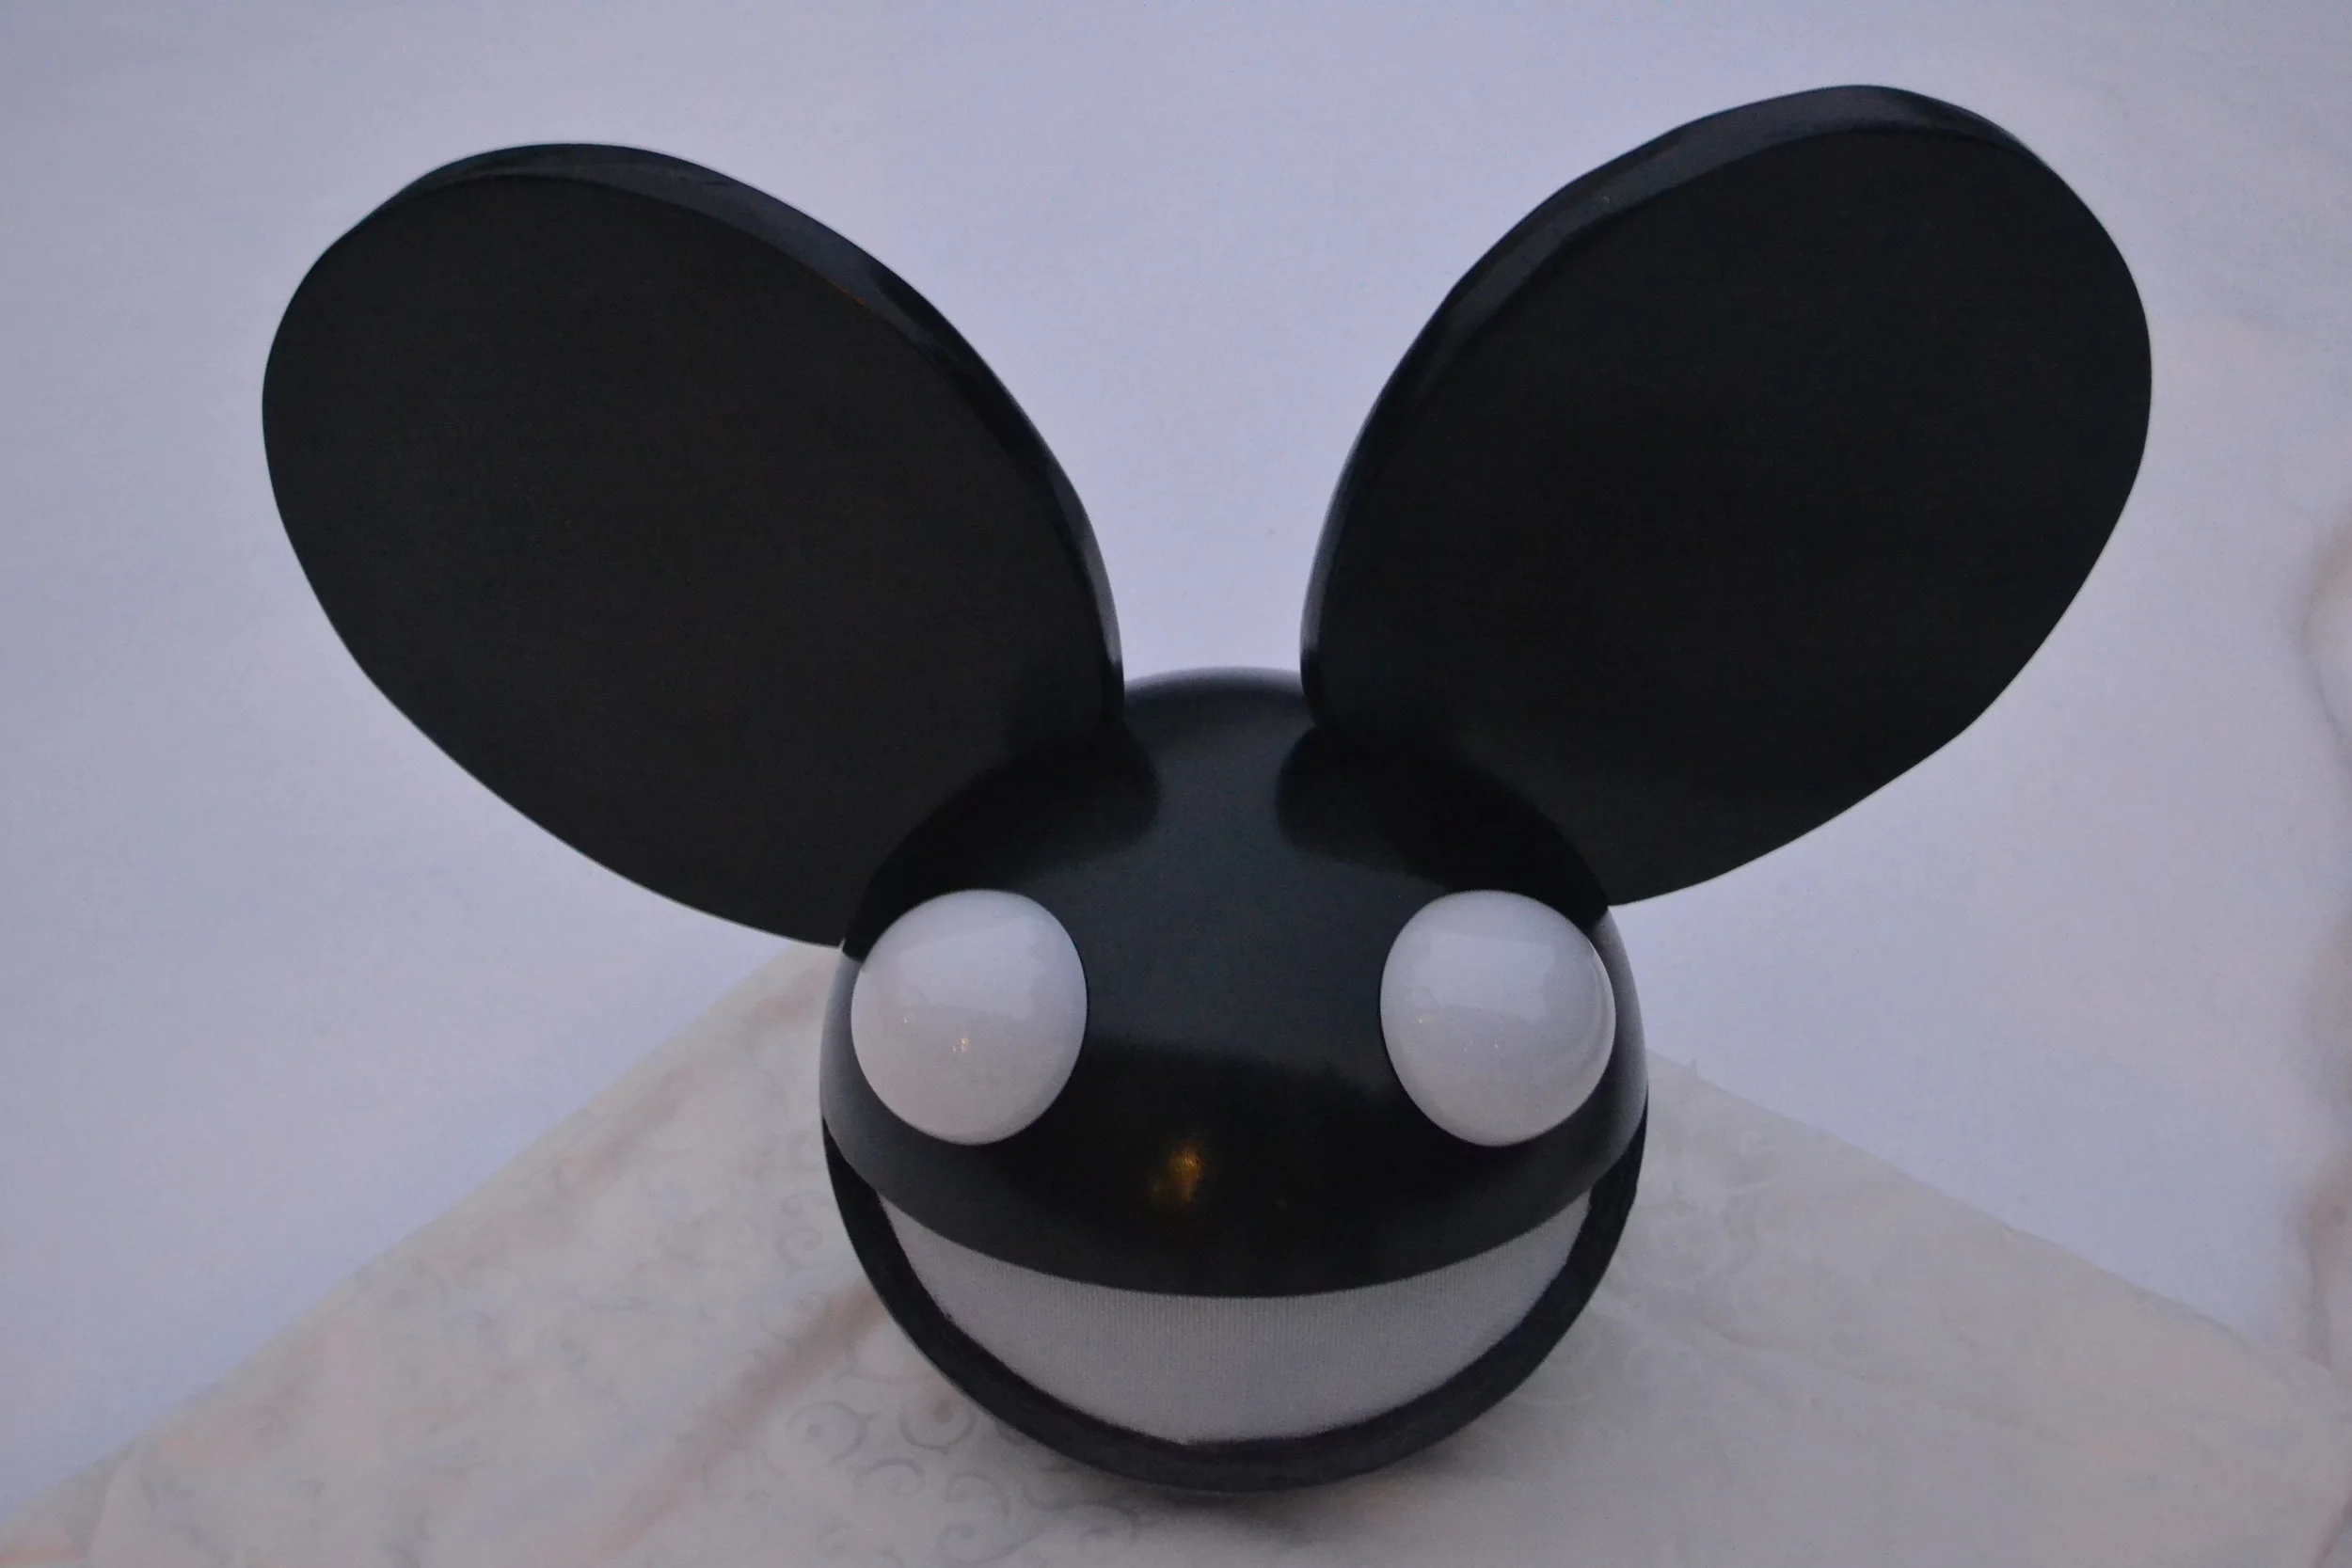
This was a project I have been wanting to make for quite some time. The opportunity came up when one of my close friends birthday was coming up and he was a very big Deadmau5 fan since the day I met him. I got a group of friends on board and started building!
My goal was to use high quality parts and create a clean, smooth finish. We decided on a black and white helmet so the lights will look good with any colour combination.
Acrylic Globes
We purchased acrylic lighting fixtures for the eyes and head of the helmet. These were custom ordered from a lighting distributor.
Ear Template
This was a template found online for the ears. The black lines are guides for steel rods.
Cutting acrylic
After drawing the measurements onto the acrylic globe, I started cutting with my diamond cutting wheel on my Dremel. I had to make sure I cut at a slow and steady pace so I did not crack the edges or melt too much of the edge.
Globe Interior painted
After cutting the mouth and neck, I painted the interior of the head. After that dried, I applied fiberglass cloth and fiberglass resin to the inside of the helmet to add strength.
Group photo
Photo of all of the components so far. This now includes the steel threaded rods and mounting hardware.
Rod Fitting
I carved groves into the foam with a Dremel and gave space for the threaded rods to fit inside. These halves will be sandwiched together.
Lip building
Since the lip had to be 1/2 inch thick, I used insulation board in the same thickness and decided to glue it to the inside. To get the proper curve without breaking the board, I cut groves into the piece using my scroll saw.
Masking off areas
I masked off areas before I started sculpting the lip.
lip sanded
The lip after lots of sanding with various sandpaper grits from 400, 800 and 2000.
Flat Black Primer
Black primer was applied to the outside of the helmet. This would be known as the base colour coat.
Test Fit!
I drilled mounting holes on the top of the helmet for the screws to fit through. The ears fit pretty nicely!
Another Test fit
This was my friend testing out the helmet. We made a mock mesh grill for testing out the visibilty.
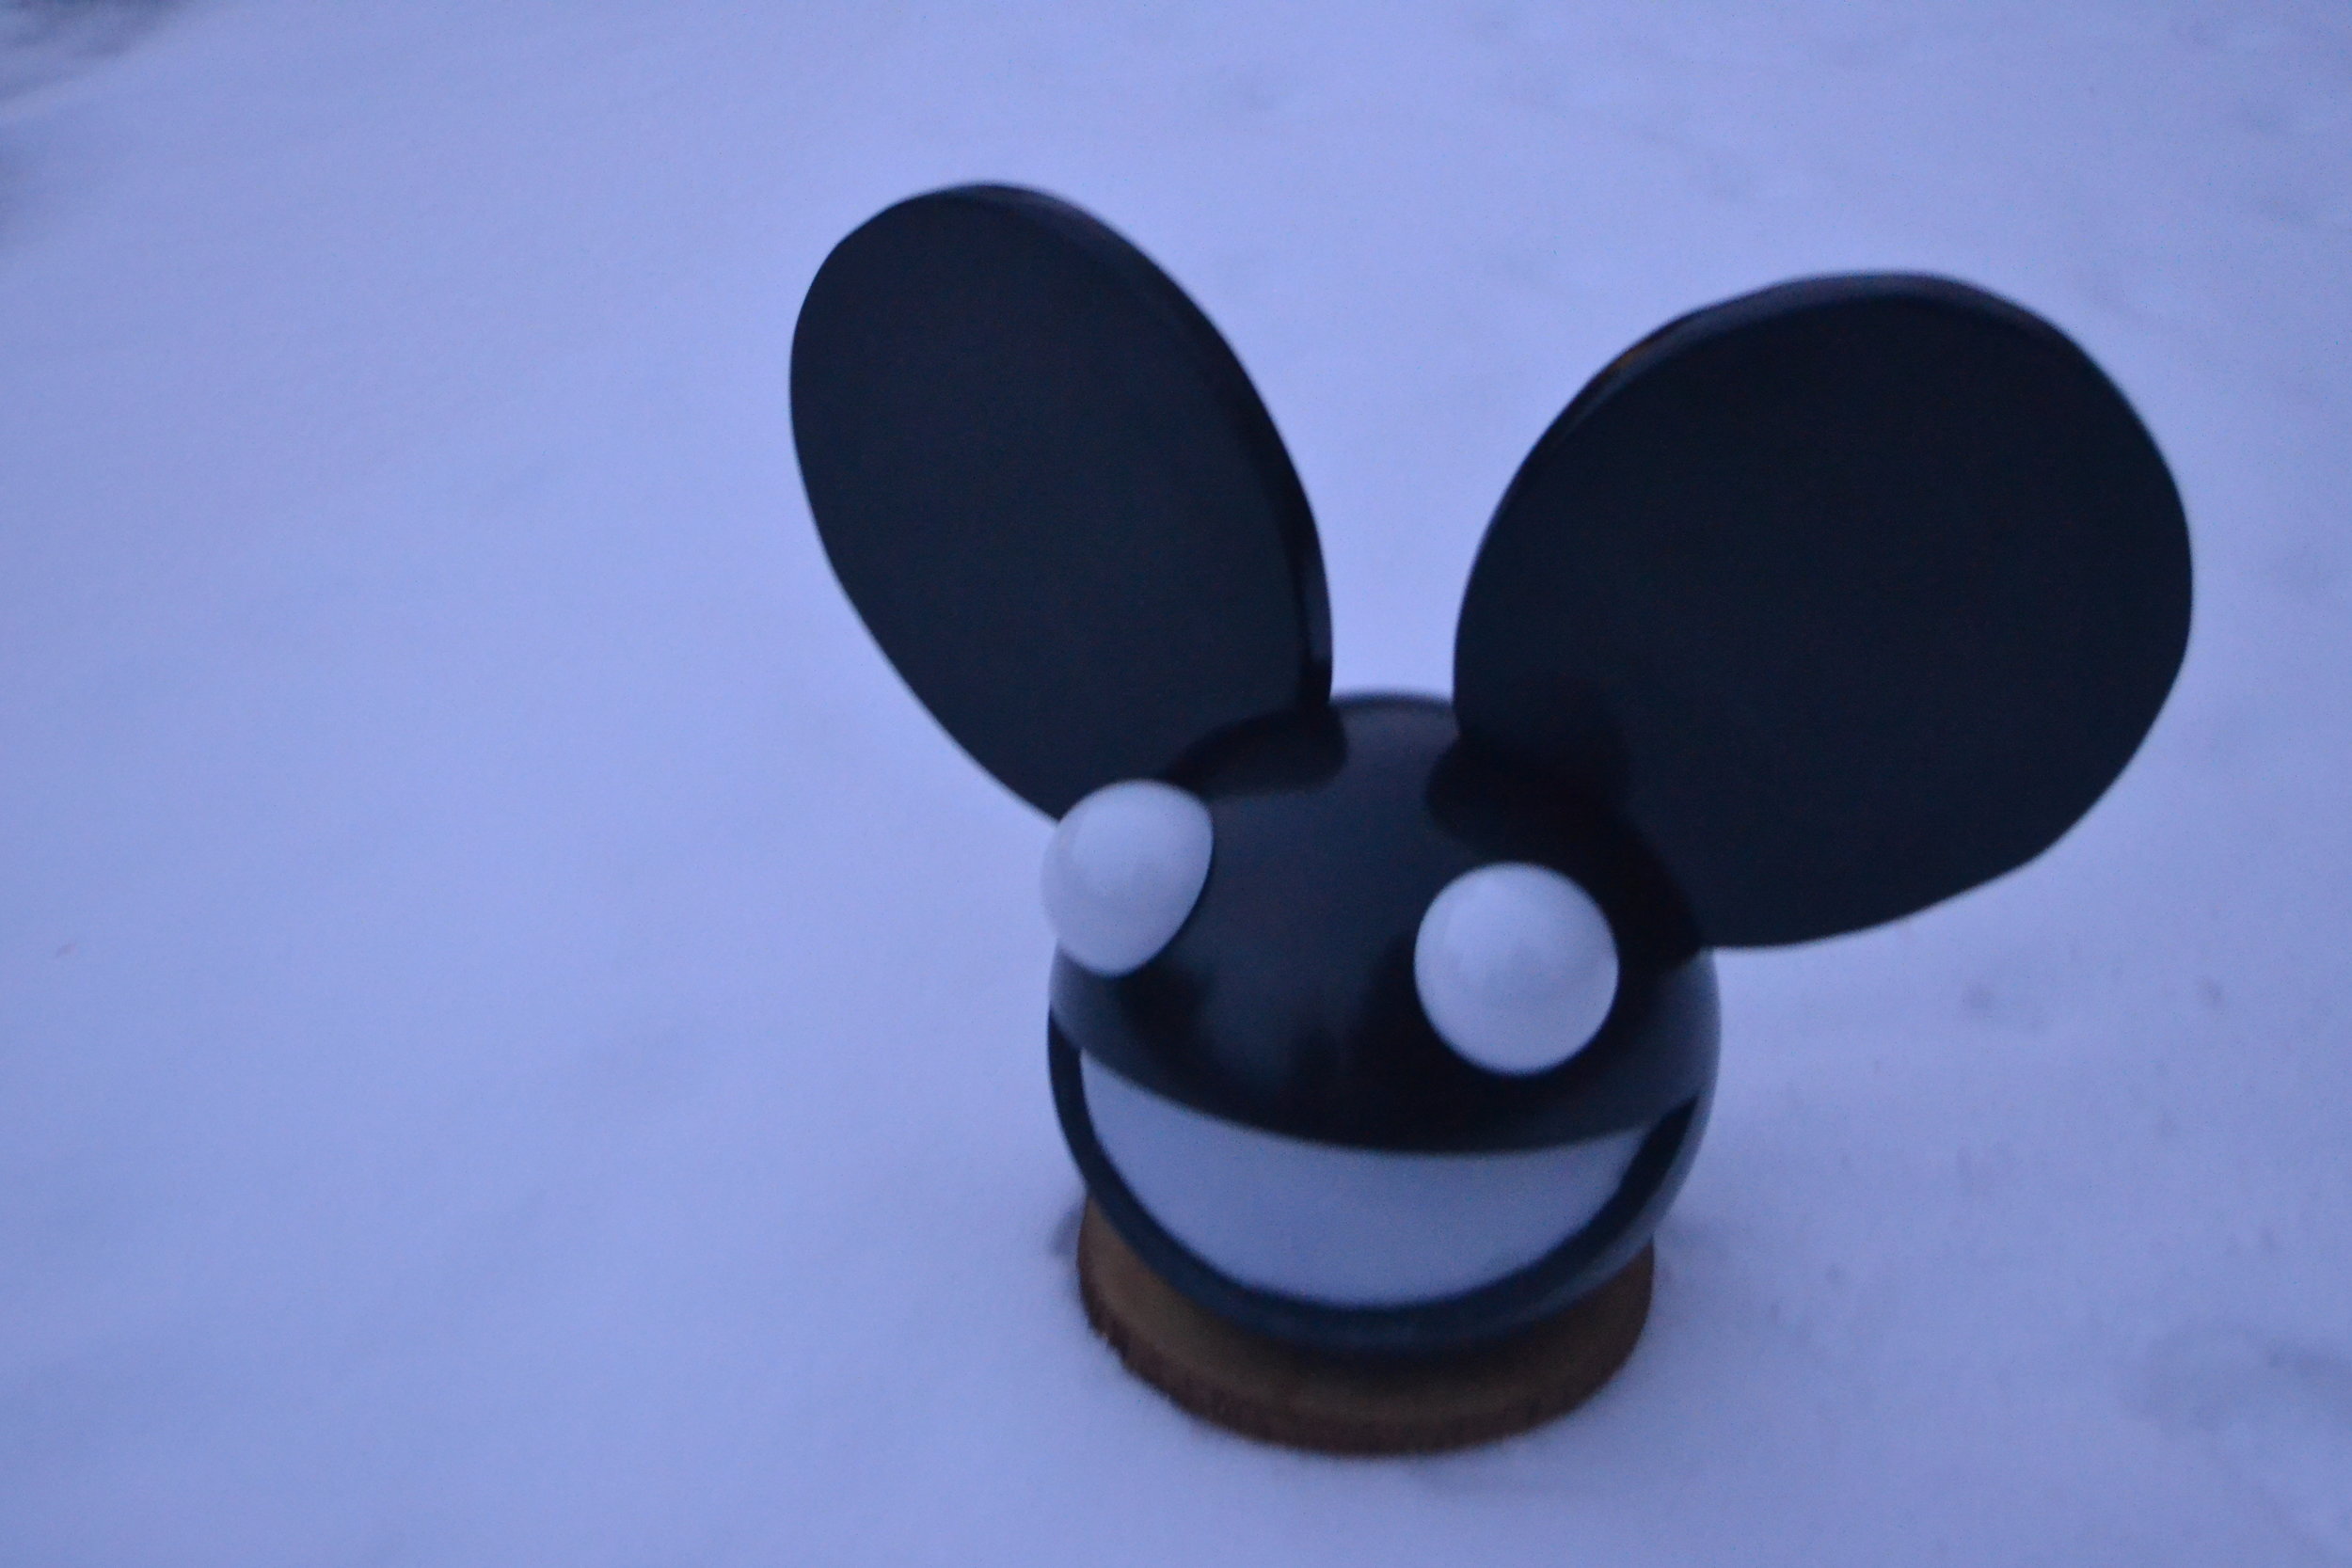
Painting Success
Black base coat finished! Sanding down everything again gave me a really nice finish to the ears and head.
Bondo + Ear Progress
I had to go back to the Bondo stage and fill + sand all the trouble areas.
Car Polish Time!
After getting back to the shiny black paint, I wet sanded the helmet with 2000 grit sand paper and applied car polish to the helmet. I only did this to the head part and you can see the difference between that and the ears.
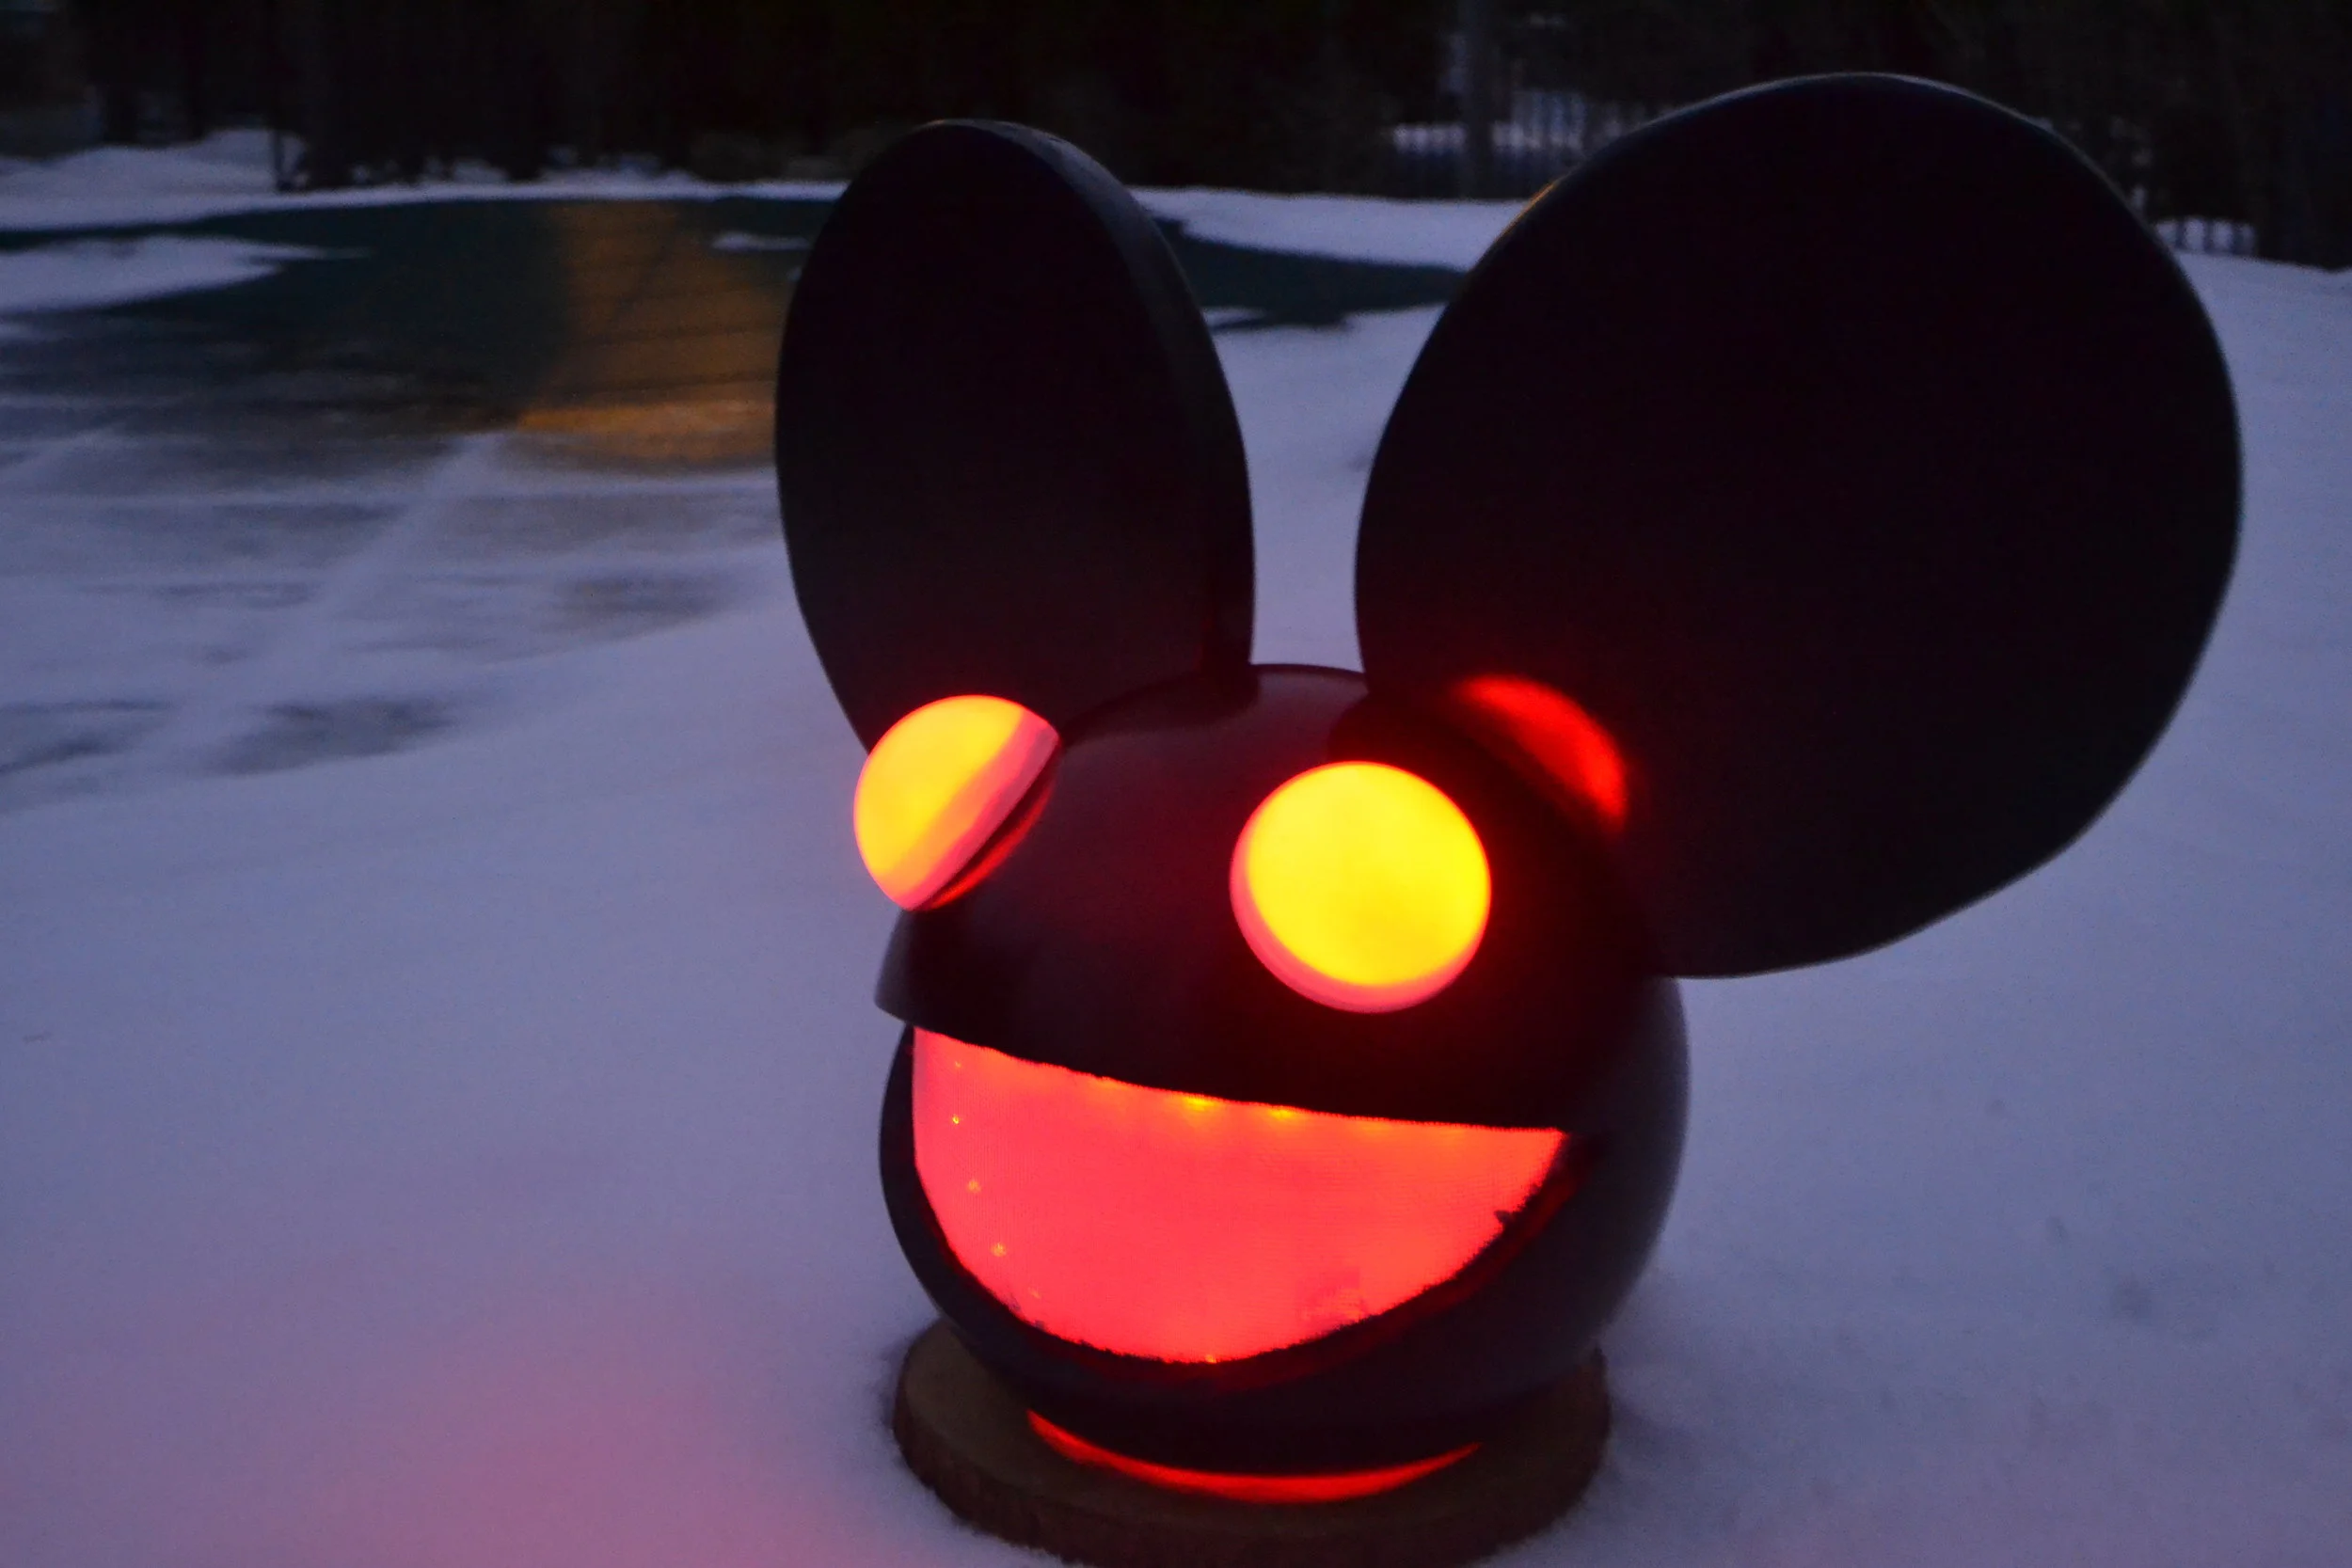
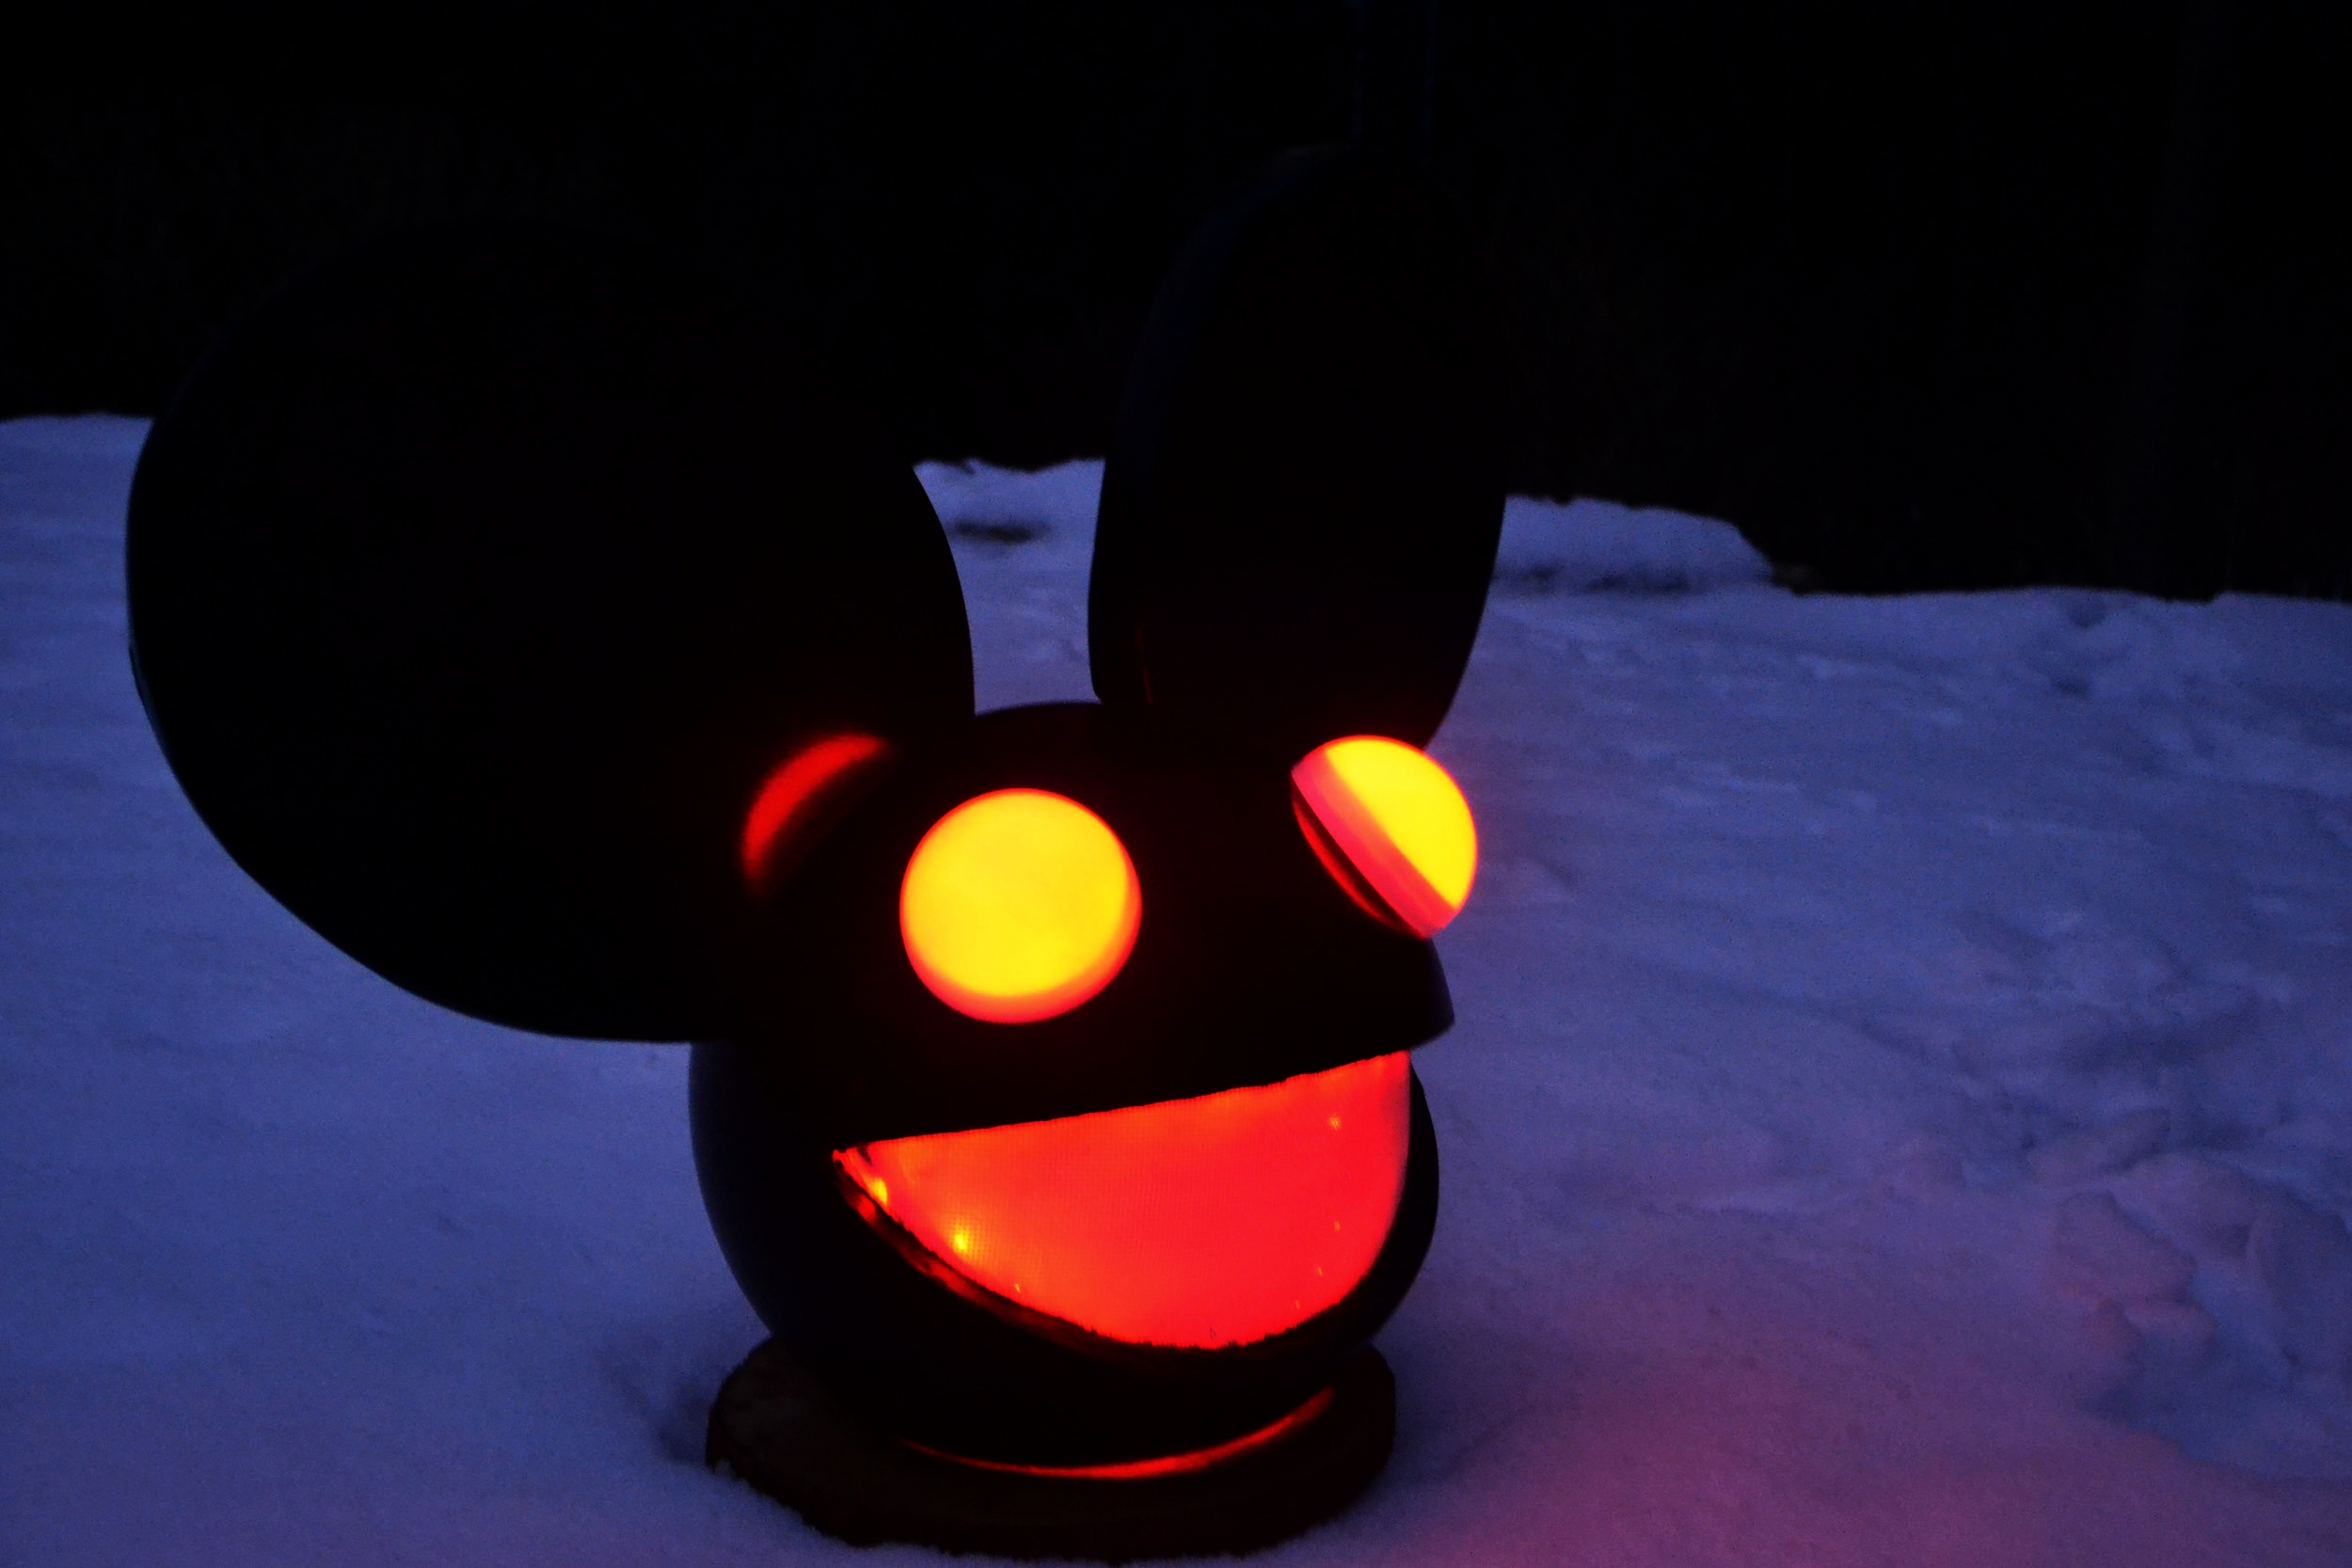
Lighting Test
Eye lights installed! I allowed the eyes to be removable in case anything went wrong.
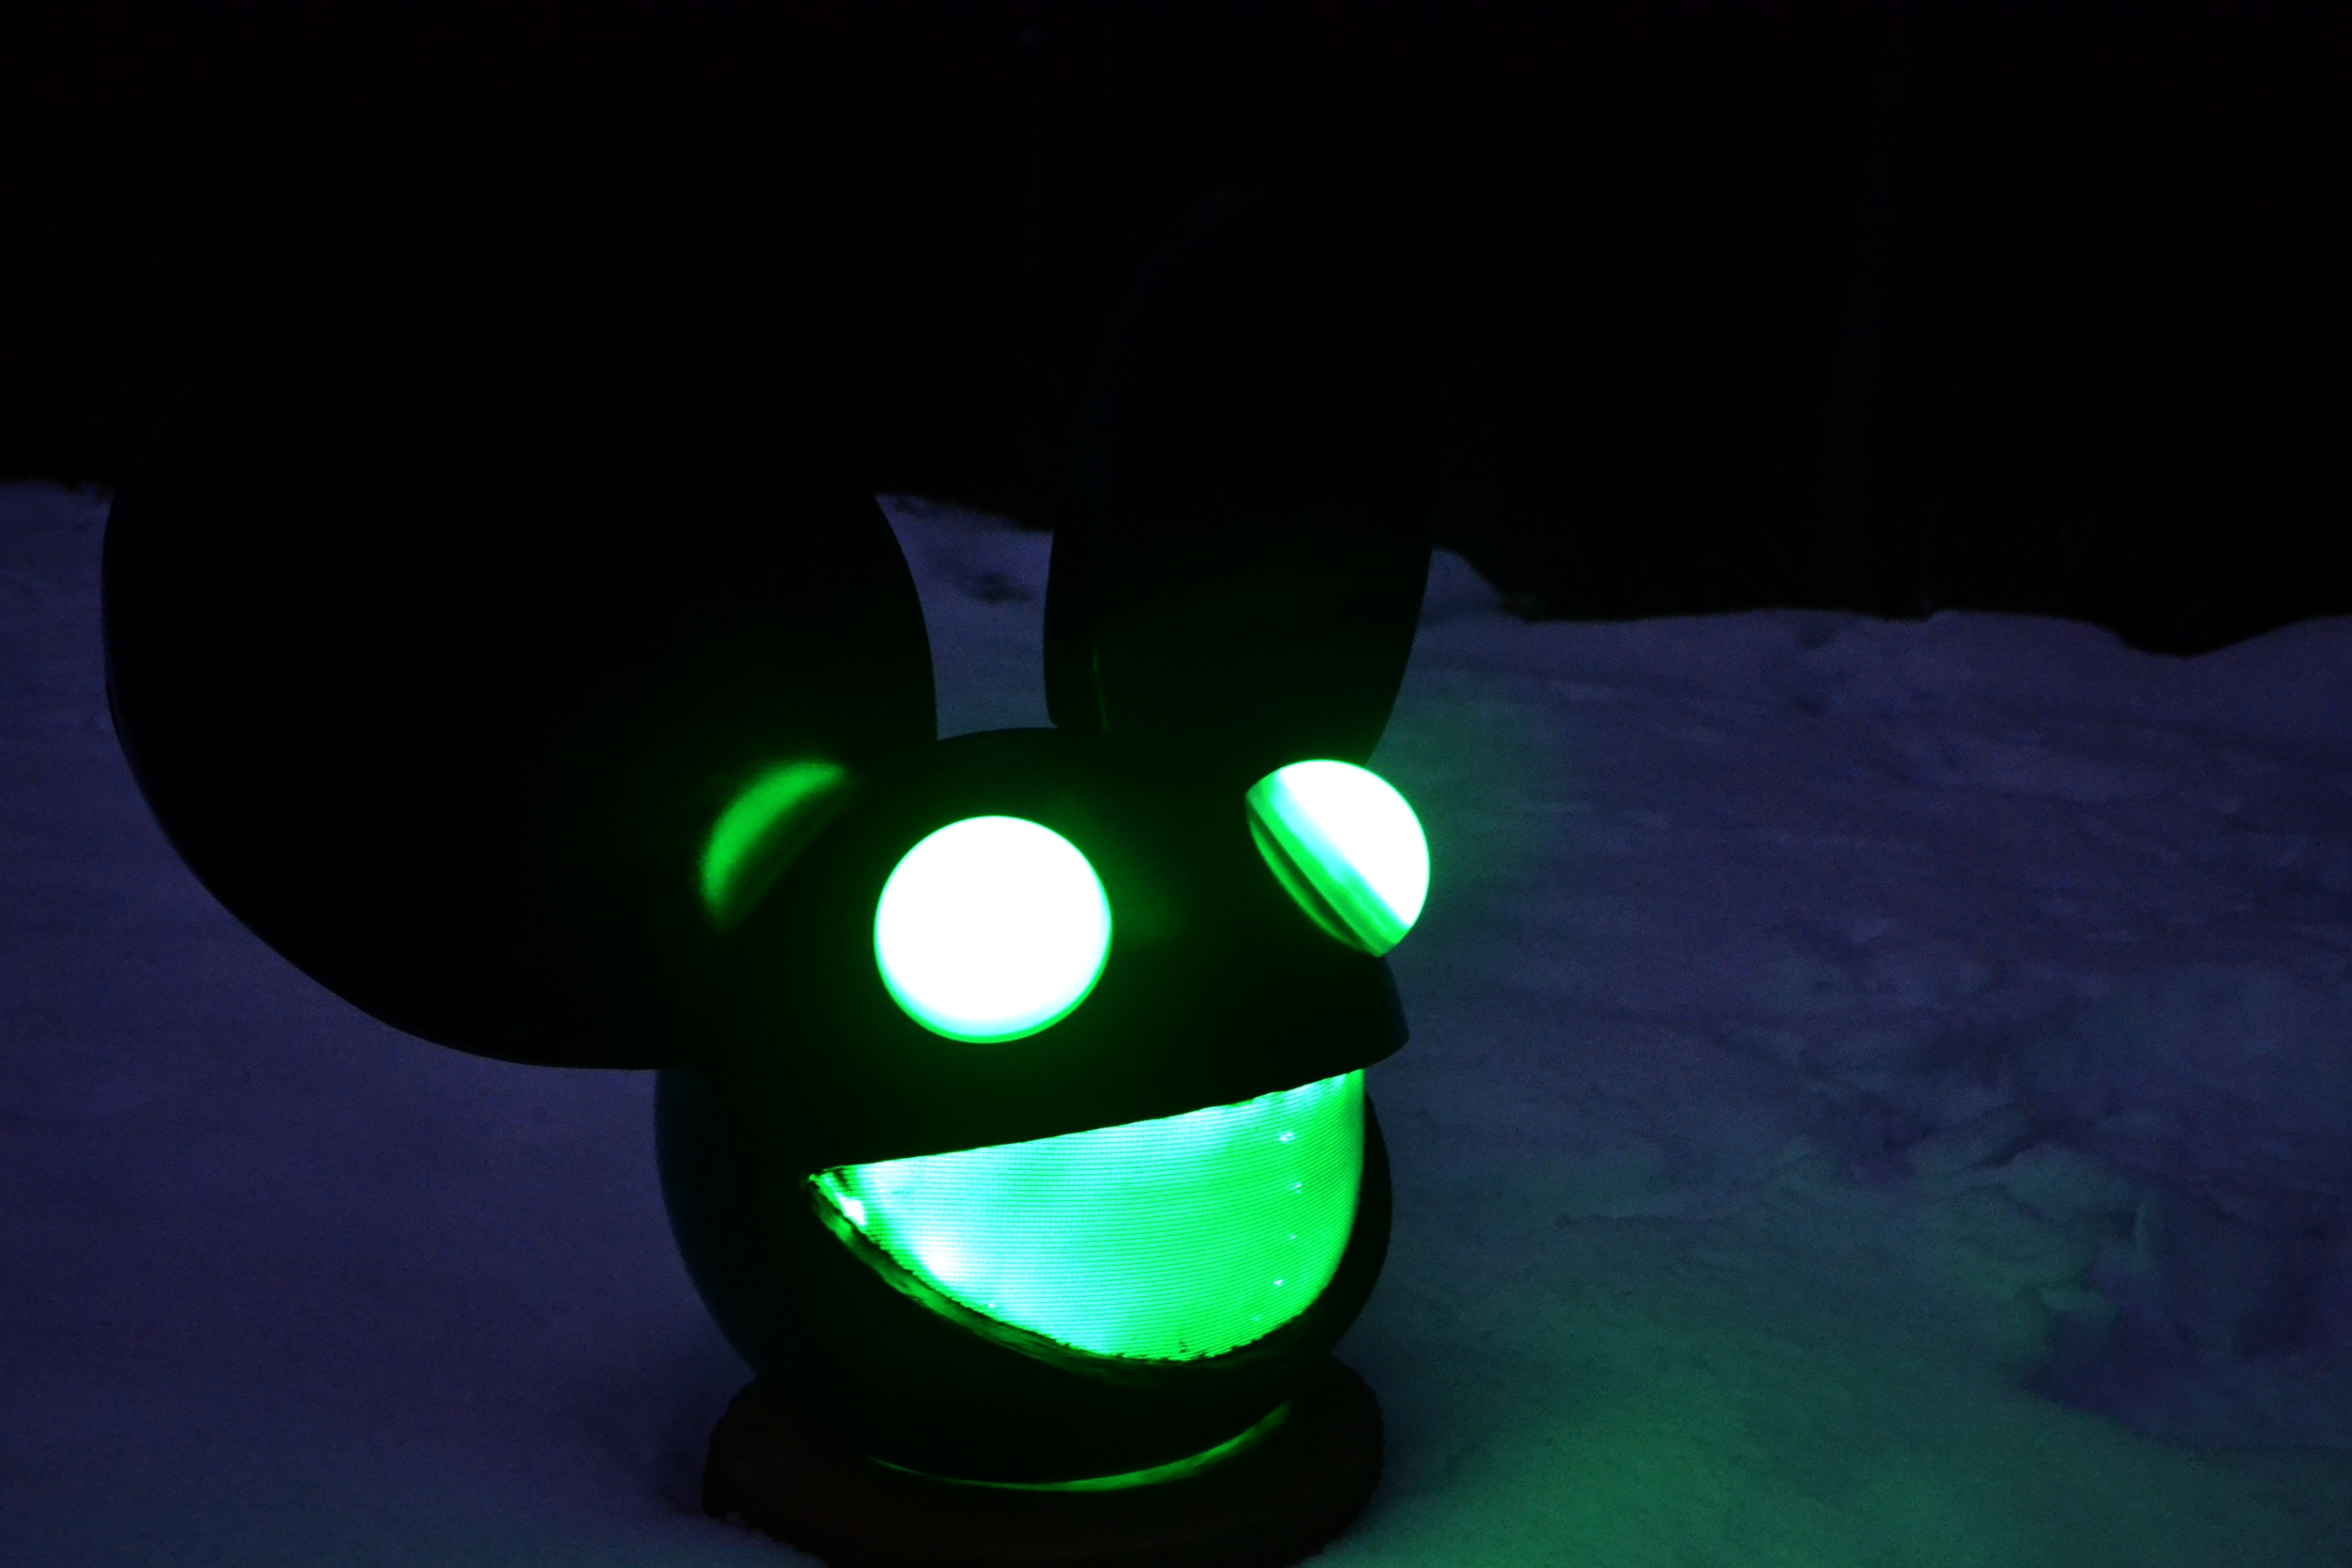
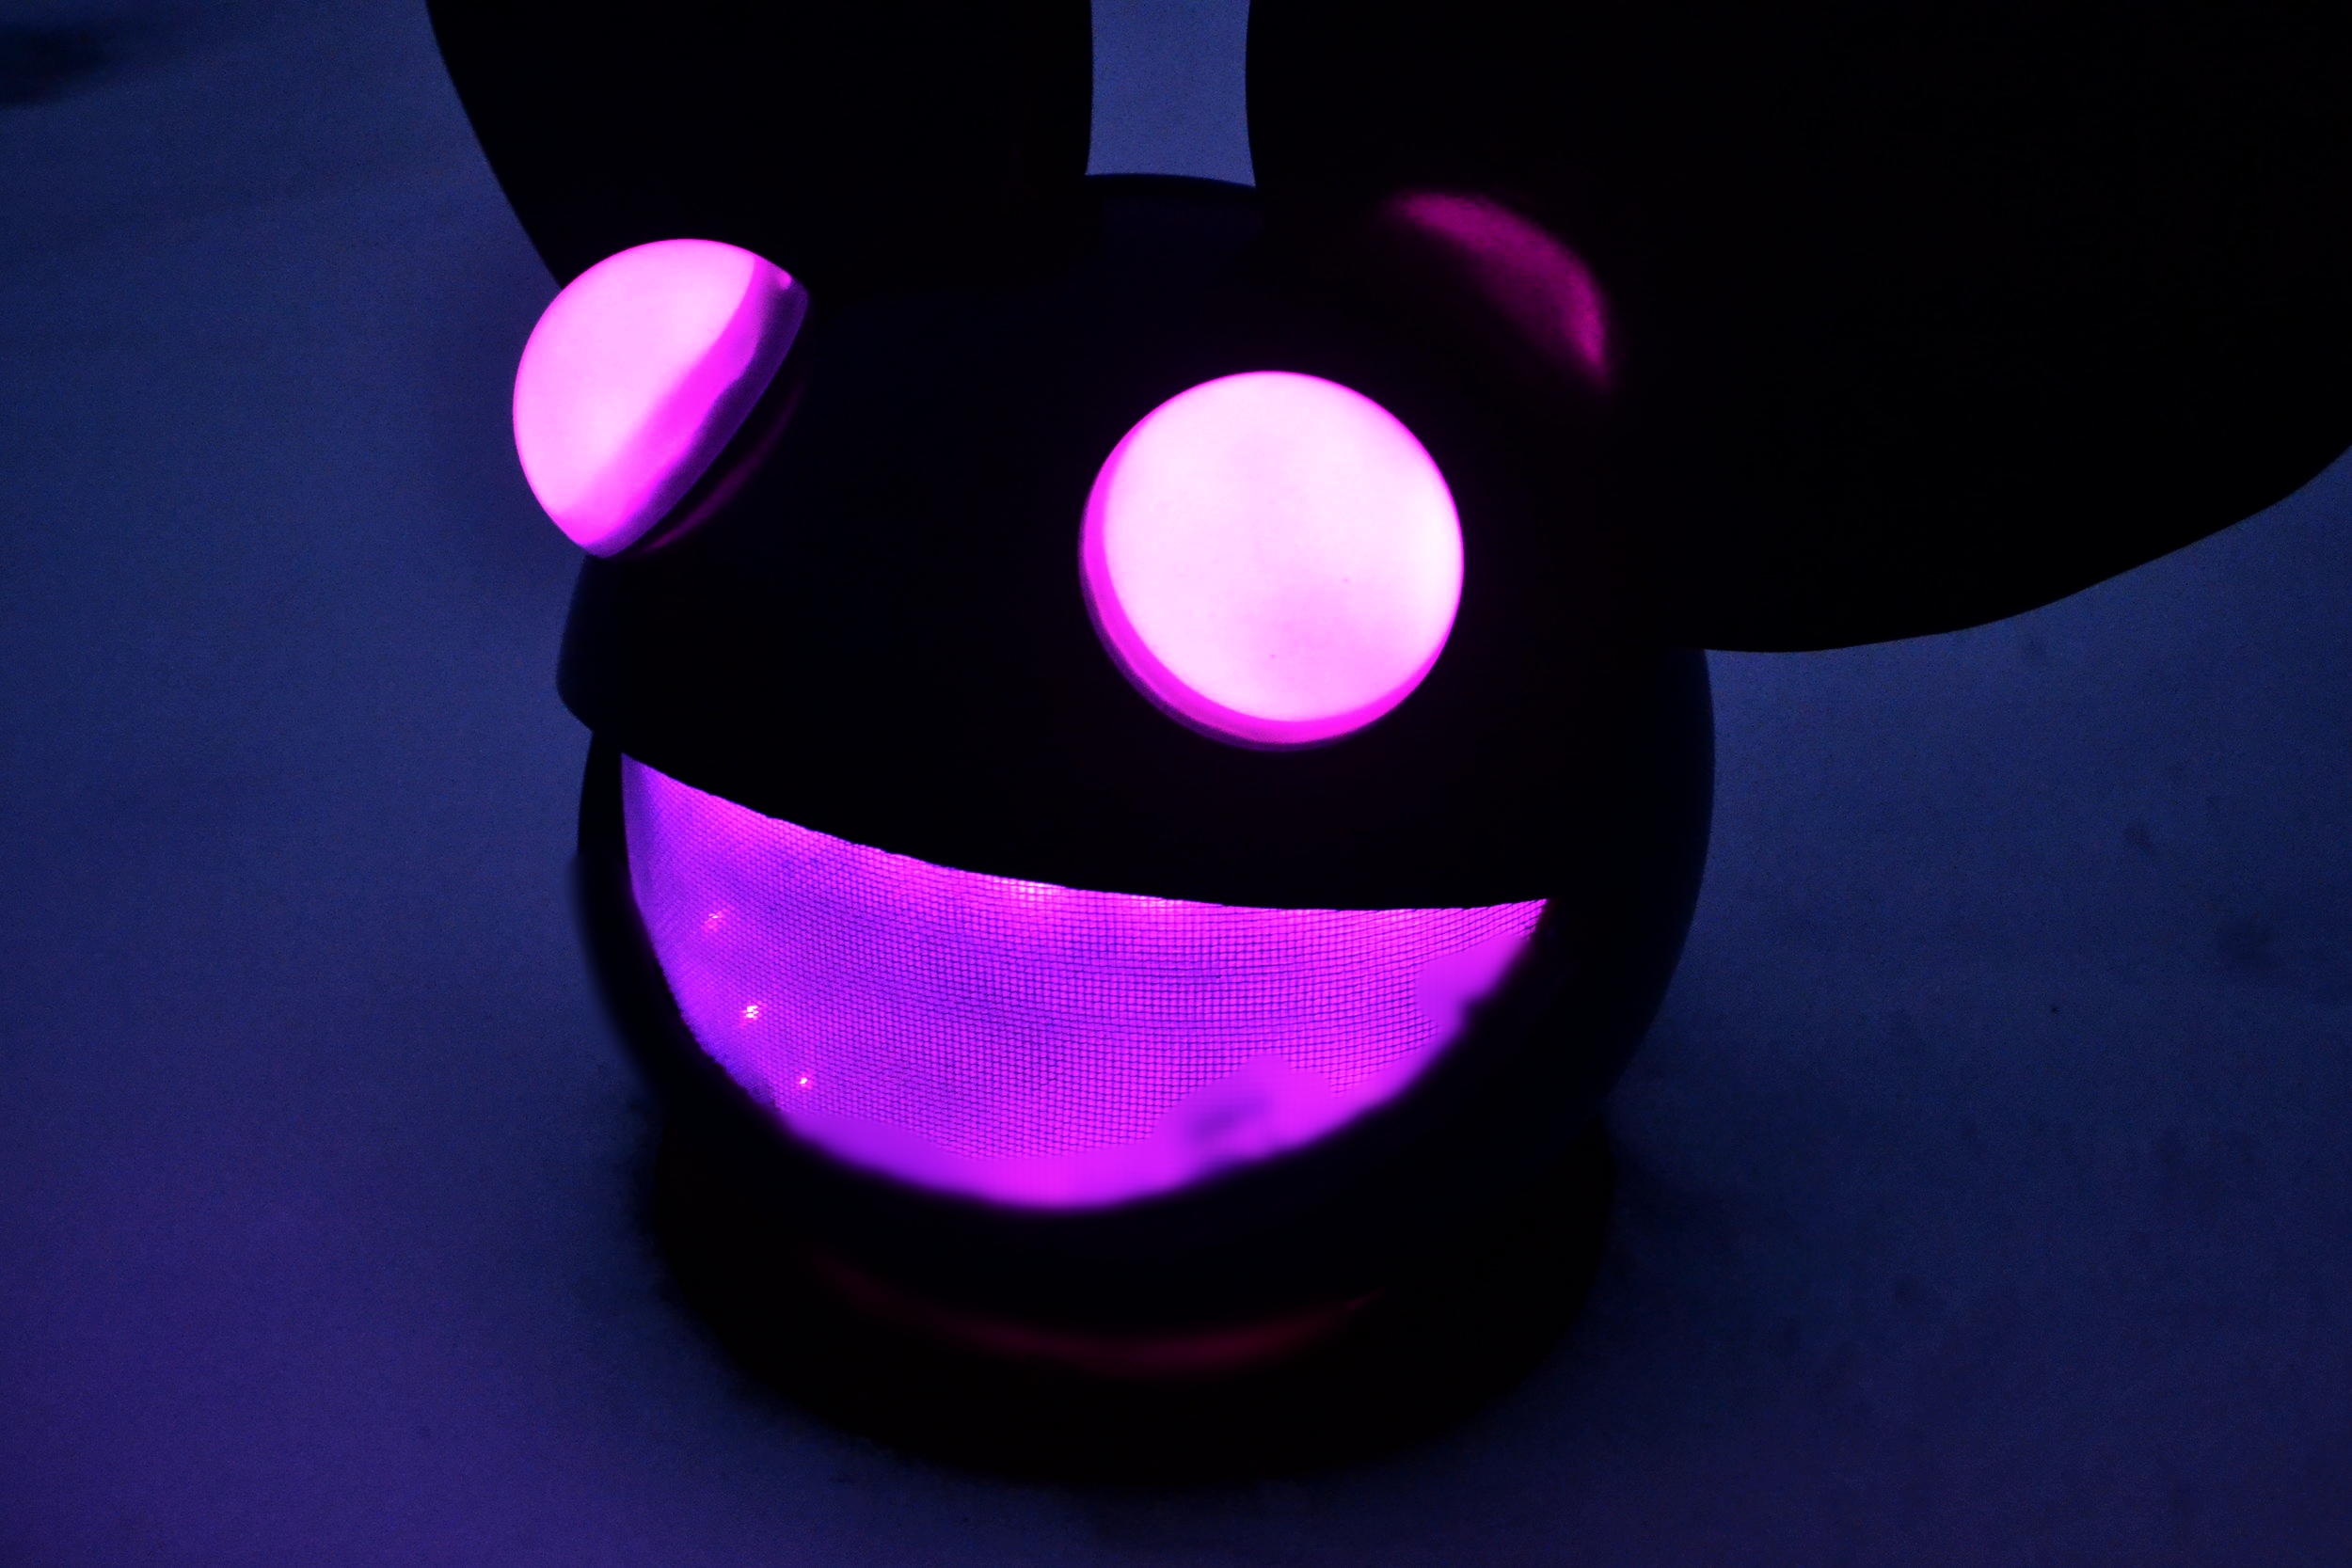
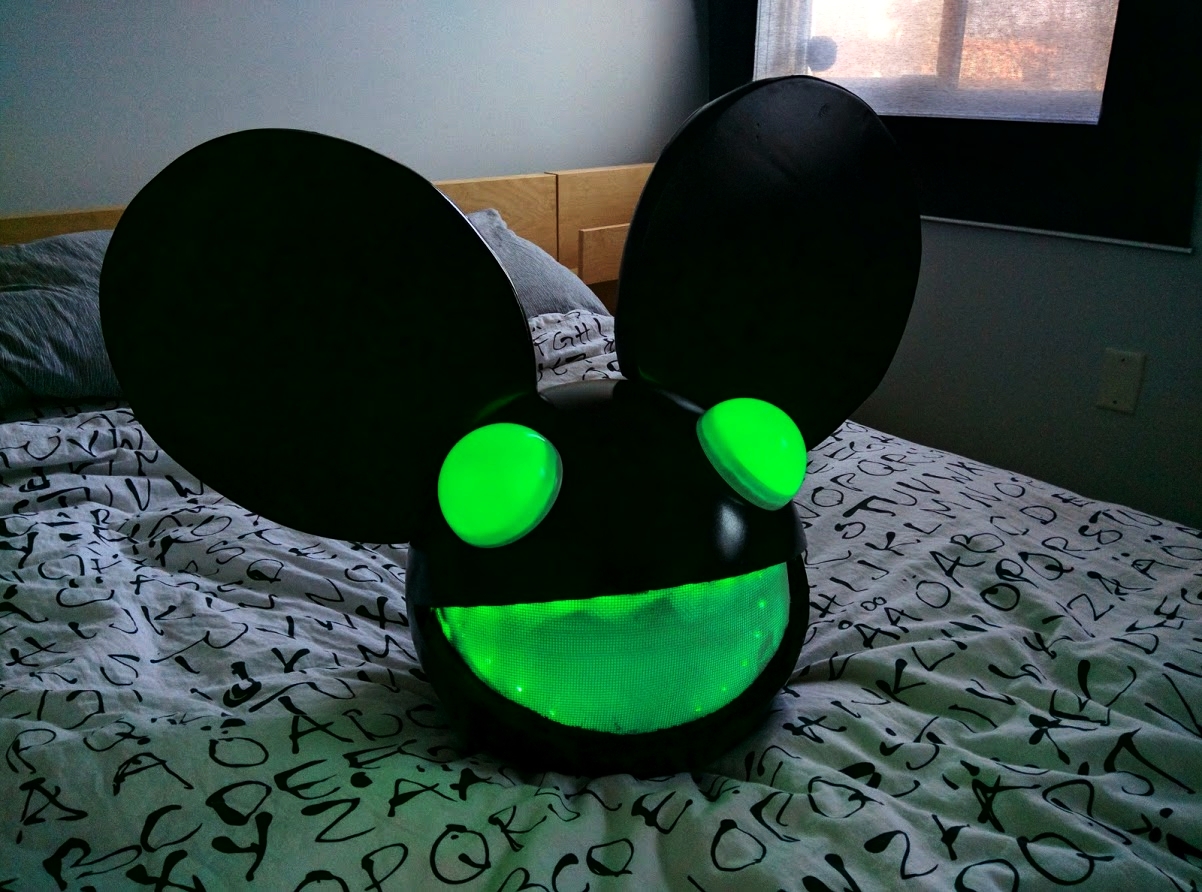
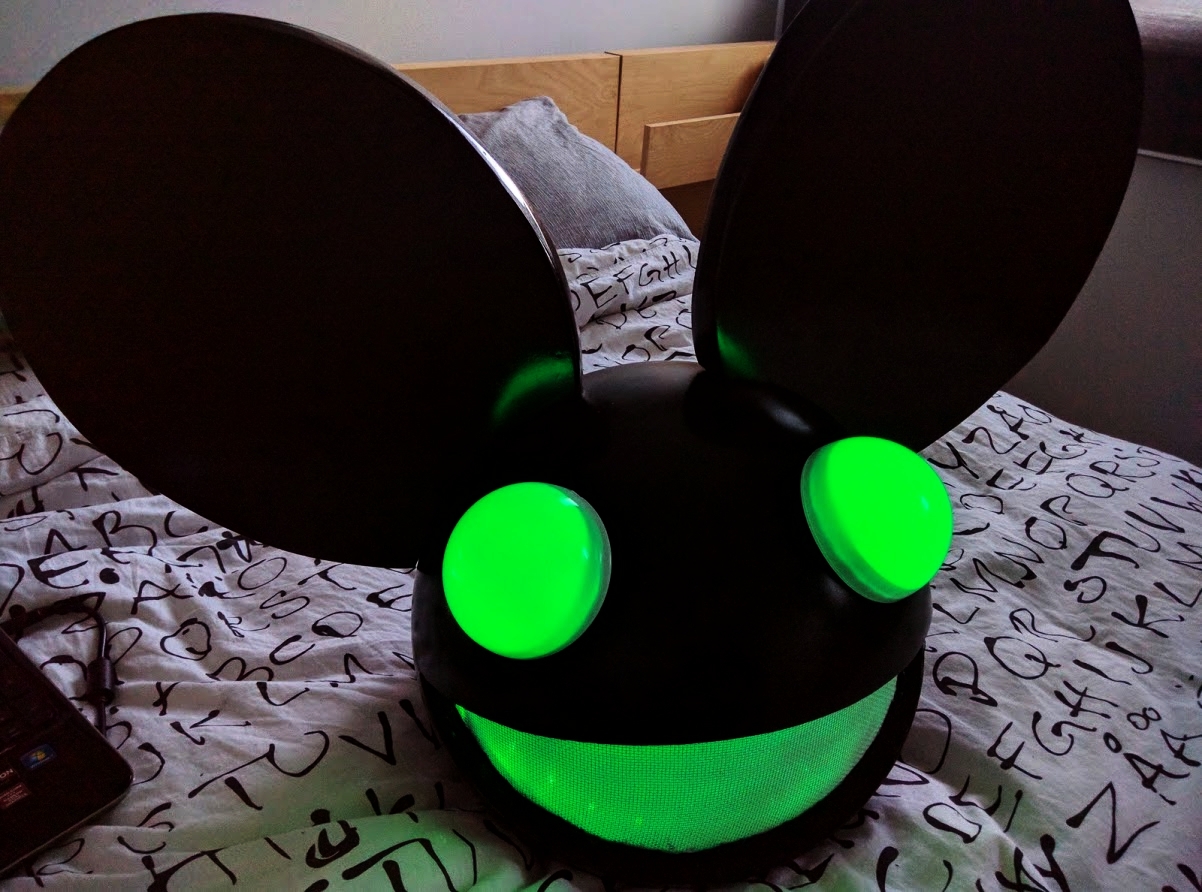
RGB Lighting
RGB LED lighting was used to make the helmet glow different colours.
Test Fit
Test fit with the eyes, ear templates and lights!
Mouth & neck Cut!
After I successfully cut the mouth and neck entrance, the top of the globe was very fragile and had to be reinforced. Fiberglass was my solution.
Ears cut out
I used the template to trace the shape onto a special insulation board. This insulation has a foam core with a fiberglass coating on the outside for strength. This was provided to me by one of my friends. These pieces were cut using my scroll saw.
ear mounting hardware
I cut down the steel rods to 12 inches each with a metal grinder. 2 of these rods will be in each ear and will prevent them from spinning from a single axis.
Sandwiched Ears
Both ear halves glued together. I used a combination of high temperature hot glue and PL Premium to glue both sections together. I used clamps all around the ears and let each ear set for 24 hours.
Test Fit!
With the lip glued in, I can finally see the shape coming along. Now it looks like it is missing teeth, so I have to fix that.
bondo time!
I used Bondo body filler to fill the gaps of the lip. This way, it can be sanded smoothly.
Bondo + Ear
Bondo was applied to one side of the ear. I applied Bondo in thin layers to minimalize the amount of sanding that would be required later.
Ear Sanding
Progress on the sanding of the ear piece!
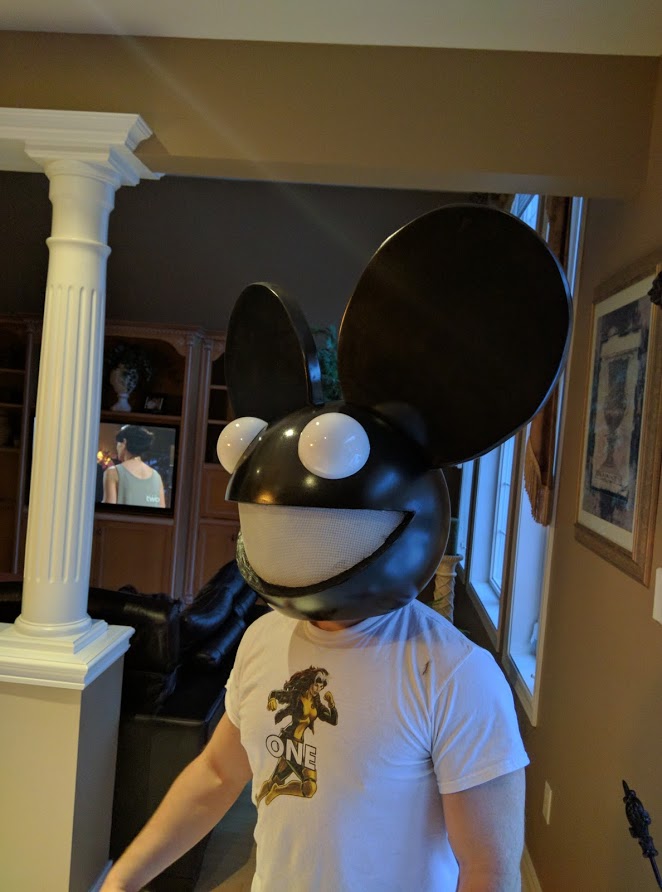
Wearable
I put the helmet on to test the sitting of the hardhat and see the distance of the helmet from the shoulders. Looks pretty good so far.
Back to basics
After attempting to paint a metallic coat on top of the primer, I kept getting an undesired effect called "orange peeling" on the paint, so I had to go back to the beginning and start over with the paint coats. This was the base, filling primer.
trouble in paradise
After applying the shiny black paint, I began to find imperfections in the finish. *sign* back to filling!!
Sanding Progress
I thought it was cool to see all of the layers in a single piece, from base, primer, Bondo and more paint!
Eye lighting!
I made a disc using EVA foam and glued aluminum foil to the top of it. After that, I cut some holes using an Exacto knife. This will allow the lights to reflect off the base a lot better.
Eyes Installed!